


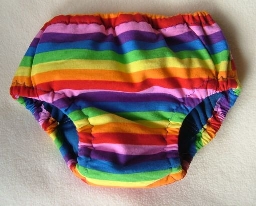
Pattern for Tiny Undies
 This
page
contains instructions for making and using a pattern for small
underwear that I designed and currently use to make little panties,
knickers, jocks and undies to measure for EC babies and small
toddlers.
This
page
contains instructions for making and using a pattern for small
underwear that I designed and currently use to make little panties,
knickers, jocks and undies to measure for EC babies and small
toddlers.
You are welcome to use the pattern to make as many undies as you like for the use of your own family or friends, but I would ask you not to use it for commercial purposes. If you are interested in a licence for commercial production, please email me.
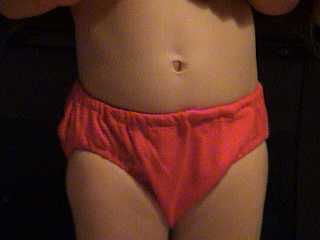
I would love to see pictures of undies you have made from my pattern when you are finished.
I hope you enjoy using this pattern - you might find that you want to make some adjustments for it to be a perfect fit for your child. If you make the adjustments I have indicated below,then you will be able to increase the size of the pattern as your baby grows. This basic size will fit 8-14 kg, more or less.
Please note that it is a pattern for underwear - NOT training pants - and is not intended to be waterproof. If you would like to make training pants from this pattern, I suggest that you check the thigh and waist measurements carefully, adjust as required, and then increase the rise at front and back to accommodate the extra thickness of absorbent fabric.
The basic configuration of this pattern assumes the baby is a girl. If you have a boy, you can double the front section of the undies and tape the crotch section to the back pattern piece thus making a mock-fly style.
If you want a pattern for training pants, you can buy my OneWet Pants pattern (available electronically with the pattern in PDF format with three sizes and comprehensive instructions and tutorial) or have a look at the links given under my Do It Yourself page for freebie patterns.
So, let's get sewing!
1. Get the requirements together.
Use an old cotton knit Tshirt to make up the first pair of undies from this pattern. An adult Tshirt will make several pairs of baby undies. A baby Tshirt will make one or two pairs of baby undies. You will also need enough elastic for waist and thigh openings - total amount is approx 10% less than waist plus twice thigh measurement. I generally use 1/4" (6mm) braided elastic in a casing, but you can use lingerie elastic or foldover elastic as well.
After you have worked out the exact fit required for your baby, then go ahead with using more expensive fabrics. Remember that you are making underwear, so ensure that the fabric will be comfortable against the skin. I recommend 100% cotton interlock for making these items.
2. Draft up the pattern pieces.
The undies pattern is shown in the following pictures. Right click each thumbnail and choose to open it larger in a separate window.
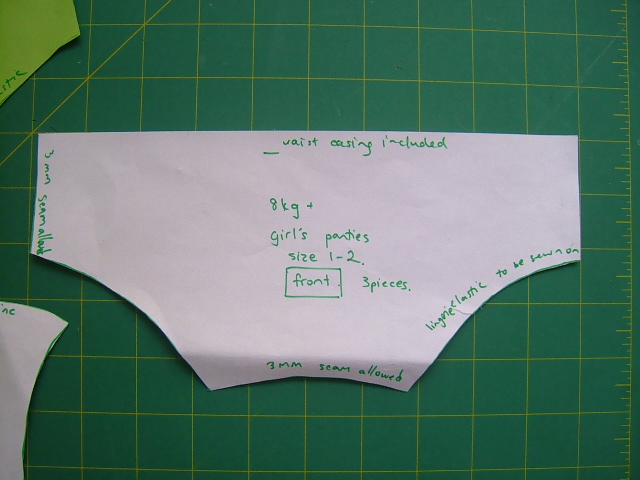
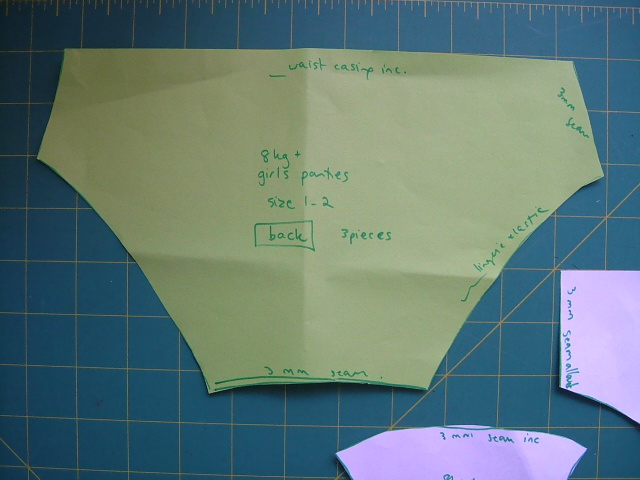

The board that the pattern pieces are photographed on has 1 inch squares. You will have to draw up the pattern pieces yourself - or print them out at the right scale. Note that if you are using casings for the legs, you must add an extra approx 1/2" of fabric at the thigh openings on each piece (including the crotch piece) for the turning allowance.
3. Cut out the fabric.
For a pair of panties for a girl, you will cut one front, one back and two crotch pieces. If you are using casings at the legs, then you may like to trim the turning allowance off the crotch piece that will be on the inside to reduce bulk.
For a pair of undies for a boy, you will cut the back and crotch in one piece and then cut two of the front piece. Tape the back and crotch pattern pieces together on the seam line and cut as one from the fabric.
4. Enclose the crotch seams.
I enclose the crotch seams, but others don't. To enclose them, follow the instructions for ladies' panties at
5. Sew the elastic casings at the leg openings (optional)
If you are using casings at the leg openings, then sew them now. I generally use a 4mm zigzag stitch and don't bother doing a double turnover for the hem as knit fabric doesn't unravel.
6. Sew the side seams
Using a straight stitch or very narrow zigzag, sew the side seams. To do this, fold the front waist to the back waist, right sides together. I overlocked the sideseams on a few pairs of undies for myself and I didn't like the extra bulk so I don't recommend using a serger/overlocker.
7. Make the waist casing (optional)
If you are using enclosed elastic at the waist, sew the waist casing now. Tuck a scrap of fabric in the casing at mid-back to make it easy to identify front/back. Sew using a 4mm zigzag stitch and leave a small opening near one side seam so that you can get into it when you thread the elastic!
8A. Thread elastic
Time to thread the thigh and waist elastic through the casings. Use a bodkin or safety pin. Check for comfort on the child. Stitch the elastic together. I do it by hand - I find it faster and less stressful than fiddling with the machine for this step :-)
8B. Sew on lingerie elastic
Cut the length of elastic required and sew the ends together. Divide the elastic ring into quarters and place a pin at each marking. Also divide the opening (waist or leg) into quarters. Place the right side of the elastic onto the right side of the undies with the raw edges together. Align the quarter-marking pins on the elastic and openings.
Under the needle, place the undies fabric down with the lingerie elastic on top. Using a narrow zigzag stitch, sew elastic to the underwear.
Now turn the elastic outwards and finger press the seam allowance back towards the body of the undies. Sew around the waist and leg openings about 3mm away from the edge of the elastic, catching the seam allowance down.
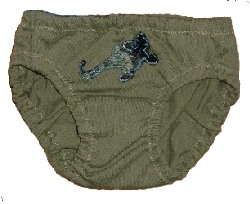
9.All done!
Voila - undies are finished. Check on the fit, make any adjustments required then search out more Tshirts to cut up LOL
Need to make any adjustments?
Here is how to make adjustments (and make them in this order)
* thigh too tight - extend the back side pieces by the extra amount plus 1" required to go round the thigh
* straddle too short - if the distance through the crotch is ok, make the back and front waist higher; alternatively make the crotch piece longer by up to 1" and add extra length to the waist if necessary
* waist too tight - extend each of the side pieces, back and front by 1/4 of the amount required and then add an extra 1/2" at each side for wearing ease.
If you decide not to make little undies for your child and would like to buy made-to-measure Noonee Knickers or HalfPint Pants please click here.
Please let me know how you go with making your own tiny underwear and I would love to see your photos. Contact me if you have any questions about this tutorial!

All prices in AUD. Shipped worldwide from Australia. Copyright 2003-2026 - Marnie Holmes -